How to separate a keiki from an orchid?
Last reviewed: 29.06.2025

Separating a keiki from an orchid is an important step in plant care that allows you to propagate the orchid and give life to a new specimen. How do you properly separate a keiki from an orchid? What methods and nuances exist for separating orchid keikis from the mother plant? In this article, we will cover all the details of the process, including the best ways to separate and transplant orchid keikis so that they successfully root and start growing actively.
What is an orchid keiki and how to separate it?
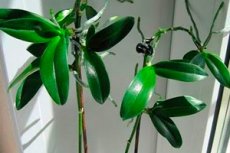
An orchid keiki is a young shoot that appears on the flower spike, stem, or root collar of the mother plant. A keiki usually appears when the orchid is kept in ideal conditions, and the plant decides to propagate vegetatively. This occurs with sufficient light, humidity, and nutrients.
To separate a keiki from an orchid, it is important to consider several factors, such as the age of the keiki, the presence of roots, and the overall condition of the mother plant. Here are the main steps to help you successfully complete this process.

When to separate a keiki from an orchid?
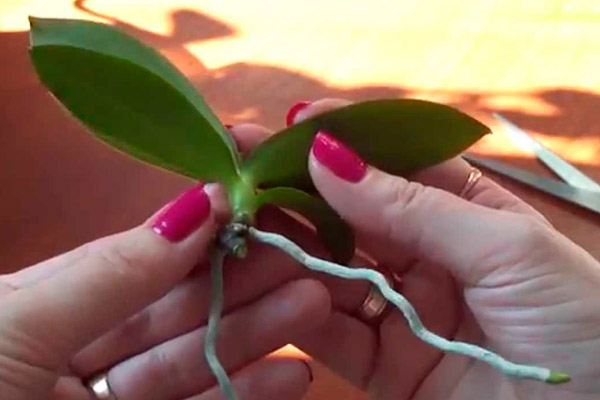
Before separating the orchid keiki from the mother plant, make sure it is mature enough and has at least 2-3 roots that are at least 4-5 cm long. Roots play a crucial role in the successful adaptation of the keiki after transplantation. If the keiki has not yet grown enough roots, it will be difficult for it to establish, and it may die.
How to tell if a keiki is ready for separation:
- The keiki has 2-3 well-developed roots.
- The keiki's leaves are firm and have a rich color.
- The mother plant is healthy and not under stress.
How to separate an orchid keiki from the mother plant: step-by-step guide
- Prepare your tools. To separate the keiki, you will need sharp, sterilized scissors or pruning shears. Be sure to disinfect the tool to avoid infecting the plant.
- Choose the right time. It is best to separate the keiki in the morning or evening when the plant is in its least active phase, minimizing stress.
- Separate the keiki. Carefully cut the keiki along with a small part of the flower spike or stem to which it is attached. It is important that the keiki has roots; otherwise, it will be difficult for it to establish.
- Treat the cuts. After you separate the orchid keiki, treat the cuts on both the mother plant and the keiki with crushed activated charcoal or cinnamon. This will help prevent infection and speed up healing.
How to plant the separated orchid keiki?
After separating the keiki, the next step is to plant it in a separate pot. Here is how to do it correctly:
- Prepare the substrate. Use a special orchid substrate consisting of bark, perlite, and sphagnum moss. The substrate should be light and provide good aeration for the roots.
- Plant the keiki. Place the keiki in the center of the pot and gently spread its roots. Fill the pot with the substrate, being careful not to damage the delicate roots. Make sure the keiki is secured tightly so that it does not wobble.
- Watering and care. Do not water the keiki immediately after transplanting. Leave it for 2-3 days to allow the cut areas to dry. Then start moderate watering using warm, settled water. To improve rooting, it is recommended to maintain high humidity—around 60-70%.
How to stimulate root growth in an orchid keiki?
If the keiki does not have enough roots, you can stimulate root growth. For this purpose, cytokinin paste is used, which stimulates the formation of new roots and shoots. Apply the paste to the base of the keiki, avoiding contact with the leaves.
You can also use root growth stimulants such as "kornevin" or similar products. These aids will help speed up the rooting process and make the keiki more viable.
Possible challenges when separating an orchid keiki
Separating an orchid keiki is not always straightforward, and sometimes challenges can arise. Here are a few common problems and how to solve them:
- Keiki without roots. If the keiki has not yet grown roots, it is better not to separate it. However, if necessary, create greenhouse conditions with high humidity for the keiki to stimulate root growth.
- Root rot. If the roots begin to rot after transplanting, the keiki may be receiving too much moisture. Reduce watering and ensure better drainage.
- Lack of growth. If the keiki does not grow after separation, it may lack light or nutrients. Provide bright, diffused light and fertilize with specialized orchid fertilizers.
Care for an orchid keiki after transplanting
After you separate and transplant an orchid keiki, it is important to provide optimal conditions for its growth:
- Lighting. The keiki needs bright, but diffused light. Direct sunlight can cause leaf burns.
- Temperature and humidity. The optimal temperature for keiki rooting is between 22 and 25°c, and humidity should be 60-70%.
- Fertilizing. A month after transplanting, you can start feeding with a weak solution of orchid fertilizer to support growth.
Conclusion
Separating a keiki from an orchid is an exciting process that allows you not only to propagate the plant but also to improve its health. It is important to remember that the success of this endeavor depends on choosing the right time, preparing the tools, and following all the care steps. By following these recommendations, you can successfully separate an orchid keiki from the mother plant and grow a new, healthy plant from it.
Remember that orchids are plants that require attention and care, but their beauty and uniqueness fully justify all the efforts you put into growing them.
