Propagating orchids with cuttings
Last reviewed: 29.06.2025

Orchids are known for their elegant beauty, and propagating them allows you to expand your collection or share the joy of growing these stunning plants. One of the effective ways to propagate orchids is through cuttings. In this guide, we will cover everything you need to know about orchid propagation with cuttings at home to ensure successful growth. You will learn the proper steps, nuances, and care required to propagate orchids from cuttings, whether from a flower spike or stem.
What is propagation by cuttings?
Propagation by cuttings involves using a part of the plant, usually a flower spike (inflorescence) or a piece of the stem, to grow a new plant. This method is particularly popular among orchid enthusiasts, as it allows for relatively quick and easy propagation without the need for seeds or extensive equipment. How to propagate orchids from cuttings in domestic conditions? Let’s take a detailed look at the process.

When and which orchids can be propagated by cuttings?
Not all orchids can be propagated by cuttings, but many types, including phalaenopsis and dendrobium, are suitable for this method. The best time to take cuttings is during the growing season, typically in spring or early summer when the plant is actively growing. To propagate orchids from cuttings at home, you’ll need a healthy mother plant with at least one flowering stem or mature stem that is ready for cutting.
Key signs an orchid is ready for propagation by cuttings:
- The mother plant is mature and healthy.
- The flower spike is strong, and flowers have faded naturally.
- The stem shows active growth nodes.
How to prepare and take orchid cuttings?
- Gather tools and materials. You will need sharp, sterilized scissors or pruning shears, rooting hormone, a clean pot, and a special orchid substrate containing bark, sphagnum moss, and perlite.
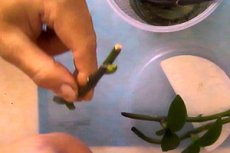
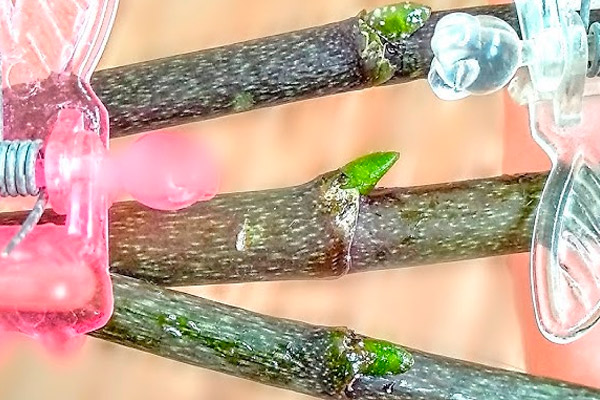
- Choose a flower spike or stem for cutting. Select a healthy flower spike that has finished blooming or a mature stem. Ideally, the spike should have two to three growth nodes (small bumps along the spike).
- Make the cut. Using your sterilized tool, carefully cut the flower spike just below a node, leaving about 10-15 cm of stem above the node. Make sure the cut is clean and smooth to minimize the risk of infection.
- Apply rooting hormone. To promote root growth, dip the base of the cutting into a rooting hormone. This step is optional but recommended, as it can increase the chances of successful rooting.
Planting the orchid cutting
- Prepare the substrate. Use a well-draining orchid mix that allows air to circulate around the cutting. Orchids require a light, airy substrate, so avoid compact soils that retain too much water.
- Place the cutting in a pot. Fill a small pot with the substrate and gently insert the cutting into the medium, making sure at least one growth node is buried. It is important to secure the cutting so that it remains stable.
- Create a humid environment. Cover the pot with a plastic bag or place it in a propagation chamber to maintain high humidity. This will help stimulate root growth and keep the cutting hydrated during the rooting process.
How to care for orchid cuttings?
After planting the orchid cutting, the next step is to provide optimal care to encourage rooting and growth. Here are some important tips for taking care of your cutting:
- Humidity: maintain humidity levels between 70-80% to prevent the cutting from drying out. High humidity is crucial for successful rooting.
- Lighting: place the cutting in bright, indirect light. Avoid direct sunlight, which can scorch the cutting.
- Temperature: keep the temperature around 22-25°c. Orchids thrive in warm, stable conditions.
- Watering: lightly mist the cutting and the substrate every few days. Do not overwater, as this can cause rot. The goal is to keep the medium slightly moist without soaking it.
How to promote root growth in orchid cuttings?
Root growth is essential for the success of propagation by cuttings. To promote root growth in orchid cuttings, consider the following:
- Use rooting hormone. Applying a rooting hormone to the cut end of the spike can speed up the rooting process and encourage the development of healthy roots.
- Maintain high humidity. Cover the pot with a plastic bag or place the cutting in a propagation chamber to maintain high humidity levels.
- Cytokinin paste. This paste is used to stimulate root and shoot formation. Apply a small amount to the growth node to promote the growth of new roots or shoots.
Challenges in orchid propagation by cuttings
Propagating orchids with cuttings is not without challenges. Here are some common issues and solutions:
- Cutting does not root. If the cutting does not root, it may be due to low humidity or insufficient warmth. Make sure the cutting is in a warm, humid environment, and consider reapplying rooting hormone.
- Fungal infections. Orchid cuttings are susceptible to fungal infections, especially if they are kept too wet. Ensure good air circulation and use a sterile substrate to minimize the risk of infection.
- Rotting. Overwatering can lead to rot. To prevent this, water sparingly and always use a well-draining substrate.
Orchid care after rooting
Once your orchid cutting has successfully rooted and you see new growth, it’s time to provide the right care to support its development:
- Transplanting. When the cutting has developed several healthy roots, you can transplant it into a larger pot with an appropriate orchid mix.
- Fertilizing. After a few months, start feeding the young orchid with a balanced orchid fertilizer diluted to half strength to promote healthy growth.
- Lighting and watering. Continue to provide bright, indirect light and moderate watering. As the plant matures, adjust the care routine to meet the needs of an established orchid.
Conclusion
Propagating an orchid through cuttings is a rewarding way to expand your collection and grow new plants from an existing one. By following these detailed steps—from taking cuttings to planting and providing proper care—you can successfully propagate orchids in your home. Remember, patience is key, as orchids take time to establish, but the results are well worth the effort.
Whether you are propagating orchids from flower spikes or stems, the right care and attention to detail will help ensure that your new orchids thrive and flourish. Enjoy the journey of growing these magnificent plants through the art of propagation!
