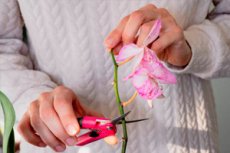
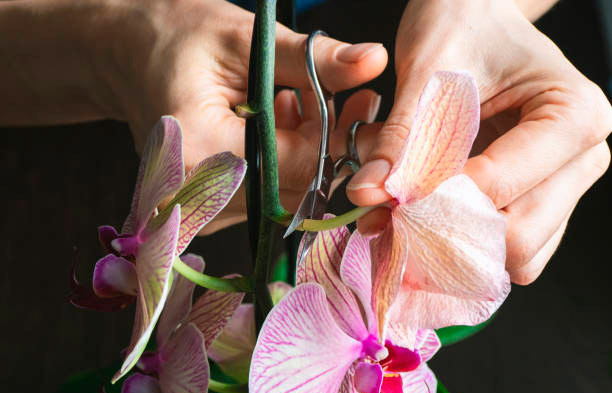
Orchid pruning
Last reviewed: 29.06.2025

Pruning an orchid is a crucial part of orchid care, helping the plant grow healthier and bloom more abundantly. In this detailed guide, we'll explore everything related to orchid pruning, including when and how to prune, and what to do after pruning to ensure the plant's recovery and continued health.
1. When to prune an orchid?
Orchids generally require pruning after flowering to remove dried or dead flower spikes and encourage new growth. The best time to prune is immediately after the orchid has finished blooming. During this period, the plant is transitioning from its flowering stage to a resting or growing phase, which makes it ideal for pruning.
- After flowering: once the blooms have withered and fallen off, it's time to assess the flower spike. If it has turned brown, it should be cut back completely. If the spike is still green, you may cut it down to a node, which may prompt a new bloom.
2. Pruning orchid flower spikes
The main focus of pruning orchids is often the flower spikes. Proper pruning of the spikes can encourage the plant to re-bloom or produce healthier growth.
- Green spikes: if the flower spike is green, you can prune it back to just above a node. This method may allow the orchid to produce another set of flowers from the same spike.
- Brown or dried spikes: if the spike has turned brown and dried, it should be pruned at the base. This will help the orchid divert energy to root and leaf growth rather than maintaining a non-viable spike.
3. Pruning orchid roots
Orchid roots also require occasional pruning, particularly during repotting. Pruning the roots helps get rid of dead or rotting tissue, which could otherwise harm the plant.
- Dead or rotting roots: remove any brown, mushy, or dried roots during repotting. Healthy roots are typically firm and white or green.
- Air roots: air roots (those growing above the substrate) should generally be left alone, as they help the orchid absorb moisture from the air. However, if these roots are dry or damaged, they can be trimmed with sterilized scissors.
4. Tools and preparation for pruning
Before pruning, make sure to gather all necessary tools and properly prepare them. Clean, sharp tools help minimize damage to the plant and reduce the risk of infection.
- Sterilize tools: use sterilized scissors or pruning shears. You can sterilize them using rubbing alcohol or by holding them over a flame for a few seconds.
- Use gloves: wearing gloves will help prevent the transfer of bacteria and fungi from your hands to the plant.

5. How to prune orchid leaves
Orchid leaves are rarely pruned unless they show signs of disease or severe damage. If the leaves are yellowed, withered, or have spots indicating disease, it's best to remove them.
- Cutting leaves: use a sterilized tool to cut the leaf at the base. Make sure to cut only the damaged portion to avoid unnecessary stress on the plant.
6. Treating an orchid after pruning
After pruning, it is essential to properly care for the orchid to ensure it recovers well and remains healthy.
- Wound treatment: treat the pruned areas with a fungicide or powdered activated charcoal to prevent infection. This step is especially important when cutting roots or leaves.
- Watering after pruning: avoid watering the orchid immediately after pruning to prevent moisture from causing rot at the cut sites. Allow at least 5-7 days for the wounds to heal before resuming regular watering.
7. Pruning orchids in home conditions
Pruning orchids at home requires attention to detail, as improper pruning can lead to infections or weaken the plant.
- Maintain clean conditions: always ensure the pruning area and tools are clean. Orchids are sensitive to pathogens, and even a small lapse in cleanliness can lead to health issues.
- Support during recovery: after pruning, ensure the orchid is placed in a location with appropriate lighting and humidity to facilitate recovery. Avoid direct sunlight, which can stress the plant.
8. Pruning special orchid types
Different types of orchids may have unique pruning needs. For instance, phalaenopsis orchids, which are the most common type, often re-bloom from their flower spikes if pruned properly, while orchids like dendrobium should have their canes left intact.
- Dendrobium orchids: do not prune the old canes of dendrobium orchids as they store nutrients and water for the plant. Only remove canes that are completely dried out.
- Oncidium and cattleya orchids: these orchids benefit from pruning of old pseudobulbs and flower spikes after blooming to make space for new growth.
9. Common mistakes in orchid pruning
Many novice growers make some common mistakes during orchid pruning that can hinder the plant's growth or even lead to its death.
- Pruning healthy tissue: only prune dried or damaged parts. Cutting healthy roots, leaves, or spikes can stress the plant and impact its growth.
- Skipping sterilization: always sterilize your tools before pruning. Unsterilized tools can introduce bacteria or fungi into the plant's tissue.
10. What to do after pruning orchids?
After pruning, orchids need a period of rest to recover. During this time, providing optimal conditions for recovery is key.
- Place in an optimal environment: ensure the orchid is placed in a spot with bright, indirect light and stable humidity levels. Avoid repotting or fertilizing immediately after pruning to give the plant time to heal.
- Monitor for pests or diseases: after pruning, keep an eye out for any signs of disease or pests. Pruned areas are more susceptible to infection until they heal completely.
Conclusion
Pruning an orchid is a vital process for promoting healthy growth and ensuring vibrant, abundant blooms. Whether it is pruning the flower spikes, roots, or leaves, proper timing and technique are crucial. Always use sterilized tools, treat wounds with care, and allow time for the plant to recover before resuming regular care routines. With proper pruning practices, your orchid will reward you with stunning blooms and continued healthy growth.
