Orchid neck issues
Last reviewed: 29.06.2025

The neck of an orchid, also known as the root neck, is a critical part of the plant's structure. Proper care of the orchid neck is essential for maintaining the health and vitality of the entire plant. However, many orchid enthusiasts face issues like rotting necks, yellowing necks, or even dry orchid necks. In this article, we will explore common problems associated with the orchid neck, such as rotting, black spots, and how to effectively treat and prevent these issues.
What is the orchid neck?
The neck of an orchid is the part of the plant that connects the leaves to the roots. It is sometimes referred to as the crown or root neck. This section is crucial for the overall health of the orchid, as it supports both the root system and the foliage. The neck acts as a conduit for nutrients and water from the roots to the leaves, ensuring proper growth.
Where is the orchid neck located? Typically, it is found just above the roots, at the base of the orchid's stem. It is important to keep this area healthy to avoid problems like rotting or yellowing, which can quickly spread to other parts of the plant.
Common problems with orchid necks
1. Rotting neck
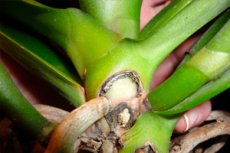
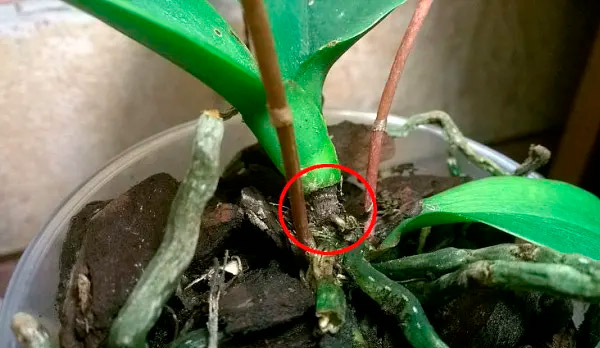
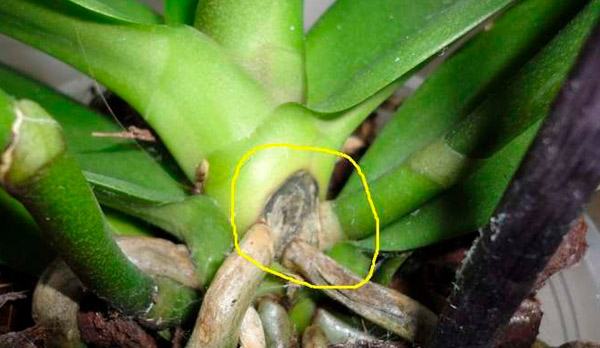
One of the most frequent issues orchid owners face is a rotting orchid neck. This condition can lead to significant damage and even kill the plant if left untreated. Why does the orchid neck rot?

- Overwatering. Excessive moisture is one of the main causes of neck rot. When the neck remains wet for extended periods, it becomes susceptible to fungal and bacterial infections.
- Poor drainage. Orchids need well-draining substrate to prevent water from accumulating around the neck.
- Poor air circulation. Stagnant air can create a damp environment around the neck, promoting the growth of pathogens.
What to do if the orchid neck is rotting?
- Isolate the plant. Remove the affected orchid from other plants to prevent the spread of infection.
- Clean the area. Carefully remove any rotting tissue using sterile scissors or a knife.
- Treat the neck. Use a fungicide or an antiseptic solution to disinfect the area. This will help prevent further spread of the infection. It is essential to treat the rotting orchid neck as soon as possible to avoid losing the plant.
2. Black spots or black neck
Black spots on the orchid neck or even a completely black orchid neck can be a sign of serious fungal or bacterial infection, often referred to as black rot. This condition usually occurs due to excessive moisture and poor airflow.

What to do if the orchid neck is black?
- Remove affected tissue. Cut away any black or damaged tissue with sterile tools.
- Treat with fungicide. Apply a fungicide to prevent the infection from spreading further.
- Improve air circulation. Ensure the orchid is in a well-ventilated area to reduce the chances of black rot returning.
3. Yellowing or dry neck
Yellowing of the orchid neck can be a sign of overwatering, nutrient deficiency, or disease. On the other hand, a dry orchid neck might indicate underwatering or dehydration.

How to treat a yellow or dry orchid neck?
- Adjust watering. Ensure that you are watering the orchid correctly. Let the substrate dry out between waterings to avoid excess moisture, which can cause yellowing.
- Nutrient supplementation. Use a balanced fertilizer designed for orchids to provide the necessary nutrients.
- Maintain proper humidity. Orchids thrive in environments with moderate humidity. If the air is too dry, consider using a humidifier.
How to prevent orchid neck issues?
Prevention is always better than treatment. To prevent problems like rotting, yellowing, or blackening of the orchid neck, follow these care tips:
- Proper watering. Water your orchid only when the substrate is dry to the touch. Avoid letting water accumulate around the neck, as this can lead to rot.
- Good drainage. Use a well-draining potting medium, such as bark or sphagnum moss, which allows excess water to escape easily.
- Air circulation. Orchids need good airflow to thrive. Place your orchid in a location with gentle air movement to reduce the risk of fungal infections.
- Avoid overcrowding. Ensure that the orchid is not crowded with other plants. Crowding can limit airflow and increase the risk of diseases.
- Regular inspection. Regularly inspect the orchid neck and roots for any signs of rot, discoloration, or pests. Early detection makes treatment much easier.
How to repot an orchid with a long neck?
Sometimes an orchid may develop a long neck, which can make repotting challenging. What to do if your orchid has a long neck?
- Select the right pot. Choose a pot that allows enough depth to accommodate the long neck without bending or damaging it.
- Use fresh substrate. Use fresh, well-draining substrate to repot the orchid. Avoid reusing old substrate, as it may harbor pathogens.
- Stabilize the plant. When placing the orchid in the new pot, ensure that the neck is properly supported. You can use stakes or ties to keep the plant stable until it becomes established.
Conclusion
The neck of an orchid is a vital part of the plant that requires careful attention. Issues like rotting, yellowing, or blackening of the orchid neck can lead to serious health problems if not addressed promptly. By understanding the causes of these issues and learning how to treat and prevent orchid neck problems, you can keep your orchid healthy and thriving.
Remember to adjust watering, ensure good drainage, and maintain proper air circulation to prevent problems with the orchid neck. Regular care and attention will help you enjoy beautiful, healthy orchids with strong, vibrant necks.
