Orchid keikis
Last reviewed: 11.03.2025

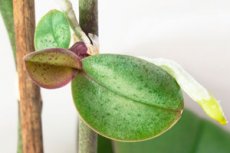
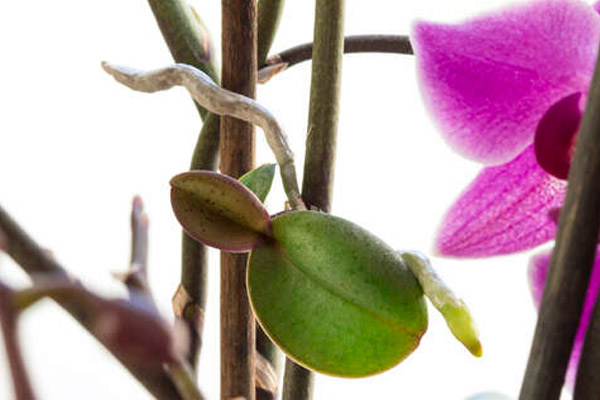
Orchid keikis are a true reward for any orchid enthusiast. These small plants appear on the flower spike or stem of an adult orchid, making it easy to propagate your favorite plant. Orchid keikis on a flower spike look like small rosettes of leaves, sometimes even with roots. In this article, we'll discuss how to separate an orchid keiki, how to properly transplant an orchid keiki, and provide care tips for keikis.
How keikis appear on an orchid?
Keikis on an orchid can appear on flower spikes, stems, or even in the basal area of the plant. The appearance of keikis is usually linked to good growing conditions—proper care, adequate light, moisture, and nutrients. Often, an orchid keiki on a flower spike appears in places where flowers were previously located.
Some orchid species, such as phalaenopsis, are particularly prone to producing keikis on their flower spikes. This can happen as a result of natural propagation or due to plant stress, such as after illness or damage.

How to stimulate keiki growth on an orchid?
To grow an orchid keiki on a flower spike, you need to create optimal conditions for the plant. Orchids require bright but diffused light, high humidity (50-70%), and regular fertilization. One method to stimulate keiki growth is to apply a hormone paste to a dormant node on the flower spike. This method helps activate the growth of a new plant.
How to separate an orchid keiki from the mother plant?
How to separate an orchid keiki is an important step that requires care and knowledge. A keiki should only be separated when it has developed its own roots at least 3-5 cm long. Roots allow the plant to continue growing independently after separation from the mother plant.
- Prepare your tools: use sharp, sterilized scissors or pruners. This is important to avoid infection.
- Carefully cut the keiki: cut the keiki along with a small part of the flower spike to minimize trauma to the plant.
- Treat the cuts: treat the cut areas on both the keiki and the mother plant with powdered activated charcoal or cinnamon to prevent infection.
How to transplant an orchid keiki?
After separation, it's important to know how to transplant an orchid keiki properly so it continues to thrive.
- Choose the right substrate: use a suitable orchid substrate consisting of pine bark, sphagnum moss, and perlite. This will provide adequate aeration and drainage for the young orchid.
- Pot selection: use a small, transparent pot with drainage holes. Transparency will allow you to monitor the root condition.
- Planting the keiki: gently place the keiki in the pot, spreading the roots through the substrate. Lightly cover the roots with bark without packing it too tightly to maintain airflow.
- Watering: allow the keiki a few days to adapt before watering. This will help reduce the risk of root rot.
How to care for an orchid keiki after transplanting?
How to care for an orchid keiki after transplanting is key to its successful rooting and growth. The location where the keiki is kept should be well-lit, but avoid direct sunlight to prevent burning the delicate leaves.
- Watering: water moderately, allowing the substrate to dry out between waterings. It's best to use the immersion method to avoid overwatering.
- Humidity: maintain high humidity around the young orchid. You can use a tray with water and pebbles, but the pot should not sit directly in the water.
- Temperature: the optimal temperature for keiki growth is between 22°c and 26°c.
- Fertilizing: begin fertilizing the keiki with a weak orchid fertilizer solution one month after transplanting.
Problems and solutions when growing orchid keikis
- Orchid keiki without roots: if the keiki is not developing roots, try increasing humidity or using a rooting hormone. You can also place the keiki in a small greenhouse to create optimal conditions.
- Keiki drying out: drying can be caused by a lack of moisture or overly dry air. Regular misting and increasing humidity can help.
- Orchid keiki blooming: sometimes a keiki starts blooming before it has developed enough roots. In this case, it's best to cut the flower spike to direct energy towards root development.
Propagating orchids with keikis: useful tips
Propagating orchids with keikis is a simple way to expand your orchid collection without additional costs. However, it's important to remember that for successful growth and development of keikis, attention must be given to the care of the mother plant. A healthy and strong orchid is more likely to produce viable keikis.
- How to grow roots on an orchid keiki: use sphagnum moss around the base of the keiki to maintain high humidity, which encourages root development.
- When to separate a keiki: don't rush to separate—give the keiki time to develop roots. The stronger the roots, the higher the chances of successful transplanting.
Conclusion
Growing and transplanting orchid keikis is a fascinating process that allows you to witness the birth of a new plant. How to separate an orchid keiki from the mother plant, how to properly transplant an orchid keiki, and how to care for it—all these steps require patience and attention, but the result is worth the effort. Your orchids will not only decorate your home but also bring the joy of being able to propagate these amazing plants yourself.
