Spider mite on orchids
Last reviewed: 29.06.2025

Spider mites on orchids are one of the most common and challenging problems faced by orchid owners, especially those growing phalaenopsis orchids. These tiny pests can cause significant damage to your plant, leading to weakened growth, reduced blooming, and even death if left untreated. In this article, we will discuss in detail spider mites on orchids, including their signs, how to get rid of them, and effective methods to control spider mites on orchids.
What is a spider mite?
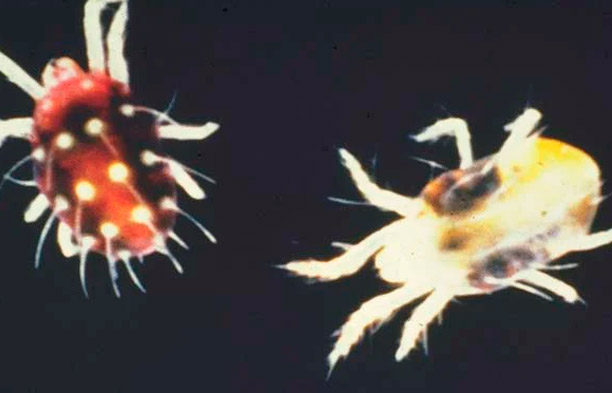
Spider mites are tiny arachnids that are almost invisible to the naked eye. They typically thrive in warm, dry conditions and feed on the plant's sap. As they feed, they cause damage to the leaves, which can eventually lead to the overall decline of the plant. Spider mites on phalaenopsis orchids are particularly common because these orchids are often grown indoors where conditions are favorable for mite development.
Spider mites form very thin, delicate webs on the undersides of the leaves and between the plant's stems. These webs are usually the first visible sign that your orchid has a spider mite infestation.
Their life cycle consists of several developmental stages, progressing rapidly under favorable conditions.

1. Egg stage
- Duration: 3-5 days (at temperatures around 25-30°c).
- Description: females lay eggs on the underside of leaves, usually along the veins. Eggs are tiny, round, and translucent or milky white.
- Features: depending on environmental conditions, eggs can survive up to 10-20 days, waiting for optimal conditions to hatch.
2. Larva stage
- Duration: 2-3 days.
- Description: a six-legged larva hatches from the egg. It is nearly transparent and very small.
- Feeding: the larva begins feeding on plant sap immediately, piercing leaf cells.
3. Protonymph stage
- Duration: 2-4 days.
- Description: after its first molt, the larva transforms into a protonymph, becoming more mobile and gaining an extra pair of legs (four pairs total).
- Feeding: the protonymph actively feeds, causing visible light spots on the leaves.
4. Deutonymph stage
- Duration: 2-4 days.
- Description: after the second molt, the spider mite becomes a deutonymph, resembling the adult form.
- Feeding: deutonymphs continue feeding aggressively, causing significant damage to the plant.
5. Adult (imago) stage
- Lifespan: 2-4 weeks (depending on temperature and humidity).
- Description: adult mites have an oval-shaped body, about 0.5 mm long. Their color ranges from pale yellow to reddish-brown.
- Feeding: adults feed heavily and create protective webs on infected plant parts to shield their colony.

Reproduction
- Type: both sexual and parthenogenetic (without fertilization).
- Fertility: one female can lay up to 100-200 eggs during her lifetime.
- Reproductive speed: the entire life cycle can be completed in just 7-10 days at 30°c and low humidity.
Factors affecting the life cycle
- Temperature: higher temperatures accelerate the life cycle.
- Humidity: low humidity favors rapid development, while high humidity slows down reproduction.
Signs of spider mite infestation on orchids
Early detection is critical to successfully dealing with spider mites. Here are the signs to look out for:
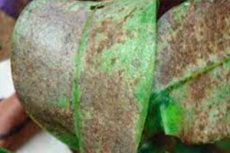
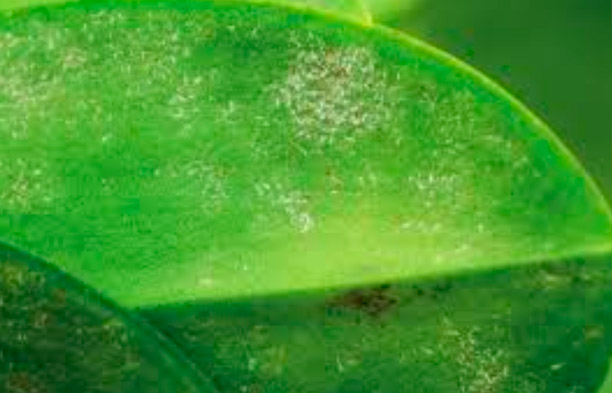
- Webbing appearance: one of the first signs of spider mites on orchids is the presence of a delicate web. This webbing is typically found on the underside of leaves or between leaf axils. Spider mite on phalaenopsis orchid photo examples can help you identify what to look for.
- Leaf discoloration: spider mites feed by piercing the plant's cells and sucking out the contents, which causes tiny yellow or white spots on the leaves, called stippling. Over time, leaves may take on a silvery appearance or become mottled.
- Leaf curling and deformation: as the infestation progresses, leaves may curl or become deformed. Spider mites on orchids can lead to a significant weakening of the plant.
- Slow growth and reduced blooming: infested orchids may exhibit stunted growth, fewer new leaves, and a reduction in flowering. The plant's resources are depleted by the mites, leading to poor health.

How to get rid of spider mites on orchids?
Fighting spider mites requires consistent care and the use of different treatment methods. Here are effective ways to get rid of spider mites on orchids:
- Manual cleaning: in the early stages of infestation, you can manually remove spider mites using a damp cloth or a cotton swab soaked in soapy water. Carefully wipe the leaves, especially the undersides, where mites are most likely to hide. Repeat this process regularly until the infestation is under control.
- Water treatment: spider mites thrive in dry conditions, so increasing the humidity around your orchid can help combat them. You can also spray your orchid with a strong jet of lukewarm water, focusing on the undersides of the leaves, to dislodge the mites. However, avoid allowing water to accumulate in the crown of the plant to prevent rot.
- Acaricides: in cases of severe infestation, using acaricides (pesticides that target mites) may be necessary. Products like fitoverm or actara can effectively kill spider mites at various stages of their life cycle. Always follow the manufacturer's instructions and safety precautions when using chemical treatments.
- Neem oil: neem oil is a natural pesticide that is effective against spider mites. Mix neem oil with water and a few drops of dish soap, then spray the entire plant, ensuring thorough coverage of the leaves, stems, and undersides.
- Isolate infested plants: if one orchid in your collection is infested, it is crucial to isolate the affected plant to prevent the mites from spreading to others. Mites can easily move from plant to plant, especially in close quarters.
- Increase humidity: since spider mites prefer dry conditions, increasing the humidity around your orchids can deter them. Use a humidifier or place a water tray near your orchids to keep the humidity level around 60-70%.
Preventing spider mite infestation on orchids
Prevention is key to keeping your orchids free from spider mites. Here are some effective prevention methods:
- Regular inspections: inspect your orchids regularly, paying particular attention to the undersides of the leaves and any areas where dust or webbing might accumulate. Early detection can make treatment much easier.
- Maintain optimal humidity: keep the humidity level around your orchids between 60-70%. Spider mites do not thrive in humid environments, so maintaining adequate humidity is an excellent preventative measure.
- Clean the leaves: regularly clean the leaves of your orchid with a damp cloth to remove dust and potential mite eggs. This will make the environment less favorable for mites.
- Avoid overcrowding: ensure proper spacing between plants to improve air circulation and reduce the likelihood of pest spread. Overcrowding can lead to stagnation of air, which is beneficial for mite development.
- Quarantine new plants: when introducing new orchids to your collection, quarantine them for a few weeks to ensure they are free from spider mites or other pests. This will help protect the rest of your orchids from infestation.
Conclusion
Spider mites on orchids, especially phalaenopsis orchids, are a common and potentially devastating pest if not dealt with promptly. Recognizing the signs of infestation early—such as the presence of webbing, leaf discoloration, and slowed growth—will allow you to take swift action. Manual removal, chemical treatments, neem oil, and increased humidity are all effective methods for combating spider mites. By following preventive measures, you can keep your orchids healthy and beautiful, free from the threat of spider mites. Regular inspections, good hygiene, and maintaining optimal growing conditions are key to ensuring your orchids remain vibrant and thriving.
