How to prune an orchid after blooming at home?
Last reviewed: 29.06.2025

Pruning an orchid after flowering is an important procedure that helps ensure the plant's health and prepares it for future blooms. Many orchid owners, especially beginners, are often unsure how to prune an orchid after blooming in their home environment. In this article, we will explain step-by-step how to properly prune an orchid after blooming, how to take care of the flower stems, and when pruning is necessary. This guide will help you understand how to care for your orchid to enjoy its beautiful flowers again.
How to properly prune an orchid after blooming?
Orchid pruning is a vital part of caring for the plant after its flowers have faded. But how should you prune an orchid after blooming, especially in a home environment? The process may seem challenging, but with a little care and the right tools, it is manageable. Let us discuss how to do it correctly.
Assessing the flower spike
Before pruning, assess the condition of the flower spike (also known as the flower stem). It is important to determine whether the spike should be cut and, if so, how to prune it properly. If the flower spike remains green, it is a sign that it may produce new flowers or side branches. In this case, you may consider leaving the spike for further development. However, if the spike begins to dry out and turn yellow or brown, it should be pruned.
How to prune the flower spike of an orchid after blooming?
Here is a step-by-step guide on how to prune the flower spike of an orchid after blooming:
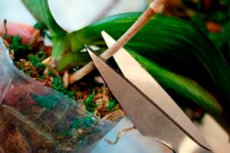
- Prepare your tools: use a pair of sharp, sterilized scissors or pruning shears. It is important that the tools are clean to avoid infecting the plant.
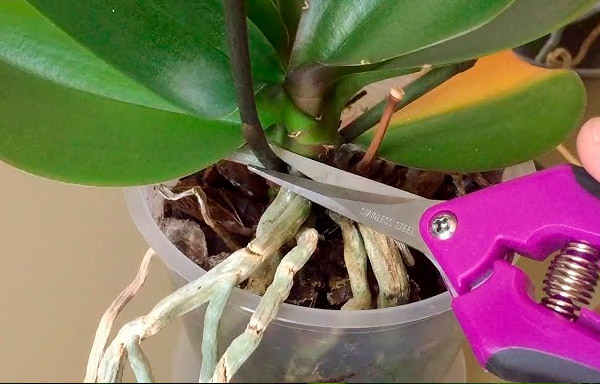
- Identify the pruning point: if the flower spike is green, prune it just above the node (the small bump on the spike) or dormant bud. This will allow the orchid to potentially produce a new side branch and flower again. If the spike is completely dry, prune it at the base, leaving about 1-2 cm above the rosette of leaves.
- Pruning technique: make a clean cut without crushing the spike. A clean cut reduces the chance of infection and ensures that the plant heals quickly. If you are pruning a phalaenopsis orchid, you can cut just above the second or third node from the base of the spike to stimulate new growth.
How to prune a phalaenopsis orchid after blooming?
Phalaenopsis orchids are among the most popular orchids for home cultivation. Pruning a phalaenopsis orchid after blooming requires special attention to the flower spike. The pruning process for phalaenopsis orchids involves:
- Partial pruning: if the flower spike is still green and healthy, you can perform partial pruning by cutting just above a node to stimulate new flower growth. This is a great way to encourage the orchid to bloom again without waiting for a completely new flower spike to grow.
- Complete pruning: if the spike is dried and has turned brown, it is best to completely cut it off at the base. This will help the plant redirect its energy towards growing new roots and leaves, which will eventually lead to new flowers.
Care after pruning
Proper care after pruning is crucial for the health of your orchid. Here are some tips for caring for your orchid after pruning:
- Watering: after pruning, reduce watering slightly to avoid overwatering. The plant needs time to rest and recover after flowering.
- Fertilizing: during the resting period, reduce the amount of fertilizer. Use a low-nitrogen fertilizer specifically designed for orchids to provide essential nutrients without stimulating excessive growth.
- Lighting: ensure that your orchid receives adequate indirect light. Too much direct sunlight can damage the leaves, while insufficient light will delay new growth and flowering.
- Temperature and humidity: maintain moderate temperatures with slight drops at night. This helps promote the formation of new flower buds. Orchids also thrive in higher humidity, so consider using a humidity tray or a room humidifier.
How to prune an orchid after blooming with photos?
For many, visual guidance is helpful when learning how to prune an orchid. You can find many detailed photos online showing exactly where and how to cut the flower spike. When looking at photos, pay attention to the color and condition of the spike, as well as the location of the nodes. Proper identification of the pruning point is key to successful orchid pruning.

Common mistakes when pruning orchids
When pruning an orchid after blooming, avoid these common mistakes:
- Using dirty tools: always sterilize your pruning tools before using them. Dirty tools can introduce bacteria or fungi that may infect your orchid.
- Cutting too low: if you cut the spike too low, you risk damaging the plant. Always leave a small portion above the leaves to avoid harming the orchid.
- Pruning too soon: make sure the spike is either fully dry or has no potential for new growth before pruning. Premature pruning can prevent the plant from re-blooming.
Conclusion
Pruning an orchid after blooming is an important part of orchid care that should not be neglected. Knowing how to prune an orchid after blooming at home, how to properly handle the flower spike, and when pruning is necessary will help keep your plant healthy and encourage it to bloom again. Whether you are dealing with a phalaenopsis orchid or another variety, the key is careful observation and proper technique. With proper care and timely pruning, your orchid will continue to thrive and delight you with its exotic beauty.
Remember that orchids are living plants that require patience and attention. Proper pruning and post-pruning care will ensure that your orchid stays healthy and blooms again, making your home more beautiful with every new flowering cycle.
