How to propagate an orchid using a flower spike at home?
Last reviewed: 29.06.2025

Propagating an orchid using a flower spike can seem challenging, but with proper guidance, even a beginner can achieve success. This method allows you to grow a new orchid plant directly from an existing flower spike, and it can be particularly rewarding. In this detailed guide, we will explore how to propagate an orchid flower spike at home, using key techniques and tips to ensure a healthy and thriving new plant.
Step-by-step guide to propagating orchids from a flower spike
Propagating orchids at home requires patience and the right technique. Below, we'll outline the key steps to successfully propagate orchids using a flower spike.
Step 1: selecting the right flower spike
To start propagating an orchid, it is crucial to select the right flower spike. Not every spike is suitable for propagation. Look for a healthy spike that is still green and robust, ideally with nodes visible. Why choose a healthy flower spike? A healthy orchid flower spike provides all the nutrients necessary to develop a new plant.
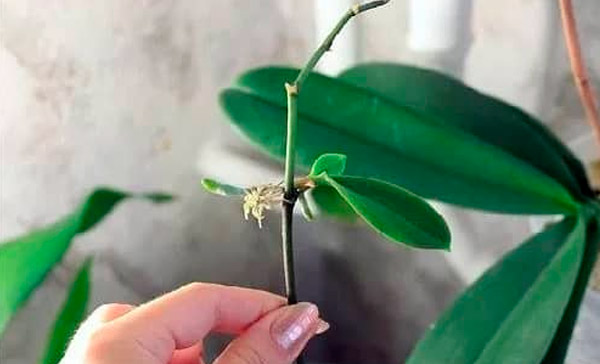
If the orchid spike has dried out, it may not be suitable for propagation. Ensure the spike is not completely dry, as dry flower spikes cannot produce new growth. If the flower spike still has green, healthy sections, you can use it to create a new orchid baby, or a "keiki."

Step 2: cutting the flower spike
Once you have selected the appropriate flower spike, you need to cut it properly. Use sterilized scissors or garden shears to cut the spike below a healthy node. The node is the small bump along the spike where new growth may emerge. Make a clean cut to prevent any damage or infection. The cut should be made at an angle to promote proper water drainage.
What is the importance of a healthy cut? A clean, angled cut allows the node to be exposed without causing damage. This creates an optimal environment for the growth of a keiki, which is the baby plant that grows from the flower spike.
Step 3: creating optimal conditions for growth
To successfully propagate an orchid using a flower spike, creating optimal conditions for growth is essential. Place the cut spike in a warm, humid environment, as orchids thrive under such conditions. Humidity and warmth play crucial roles in the development of a keiki.
You may want to use a mini-greenhouse or a transparent plastic container to cover the spike, which helps maintain high humidity levels. It is essential to keep the spike away from direct sunlight, as direct sunlight can dry out the spike and hinder growth.

Step 4: applying growth hormone (optional)
Some orchid enthusiasts prefer to use a growth hormone paste, often called keiki paste, to stimulate the growth of a new baby plant. This hormone can be applied to the nodes of the flower spike to encourage the development of a keiki. Applying keiki paste increases the chances of success, particularly if the orchid is not showing signs of new growth on its own.
Use a cotton swab or soft brush to apply a small amount of keiki paste to the selected node. Patience is key here, as it can take several weeks to months for a new plantlet to develop. Monitor the spike regularly for any signs of new growth, such as the emergence of tiny leaves or roots.
Step 5: care for the new keiki
Once a keiki has started to grow, it will need time to develop its own roots and leaves. Water and humidity are crucial at this stage, but it is also important not to overwater, as this can cause rot. Use a spray bottle to lightly mist the keiki every few days, ensuring it stays moist but not waterlogged.
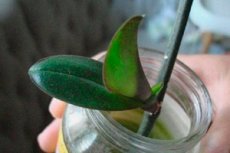
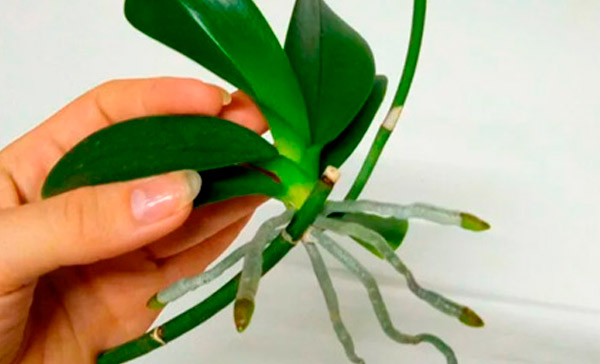
After a few months, the keiki should develop roots that are at least 5 cm long. When the keiki has a sufficient root system and a few leaves, it can be separated from the mother plant. To separate the keiki, carefully cut the connecting flower spike, and plant the new orchid baby in a small pot with orchid-specific substrate.

Step 6: transplanting the new orchid plant
Once the keiki has been successfully separated, it is time to transplant it into its own pot. Select a pot that allows plenty of drainage, as orchids need a well-aerated root environment. Use a special orchid substrate, such as bark or sphagnum moss, to plant the keiki.
After transplanting, place the young orchid in a humid and warm location with bright, indirect light. Regular care is important for its development, including appropriate watering and the use of orchid fertilizers.
Tips for successful propagation
- Maintain high humidity: orchids prefer high humidity levels, especially during propagation. Use a humidifier if necessary, or place a tray of water near the plant to increase humidity.
- Avoid direct sunlight: direct sunlight can dry out both the mother plant and the new keiki. Ensure that the orchid receives bright but diffused light.
- Be patient: orchids grow slowly, and propagating them requires time and patience. It may take several months for the keiki to reach a point where it can be separated.
Conclusion
Propagating orchids using a flower spike is a rewarding process that allows you to grow new plants from existing ones. With the right care and attention, even beginners can succeed in orchid propagation at home. Remember, patience is the key to success, as well as creating the right growing conditions to ensure the best possible chance for a new plant to develop. Follow the steps outlined in this guide, and soon you'll enjoy watching your orchid keiki grow into a beautiful new plant that will bring joy and vibrant blooms to your home.
