How to grow an orchid from seeds?
Last reviewed: 29.06.2025

Growing orchids from seeds is a fascinating yet challenging process that requires specific knowledge and patience. Unlike other plants, orchid seeds are extremely tiny and lack the necessary nutrient reserves to germinate independently. In this article, we will discuss how to grow orchids from seeds at home, covering all stages of the process, from obtaining seeds to creating optimal growing conditions.
What do orchid seeds look like?
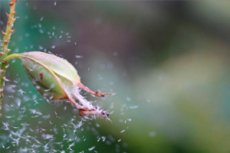
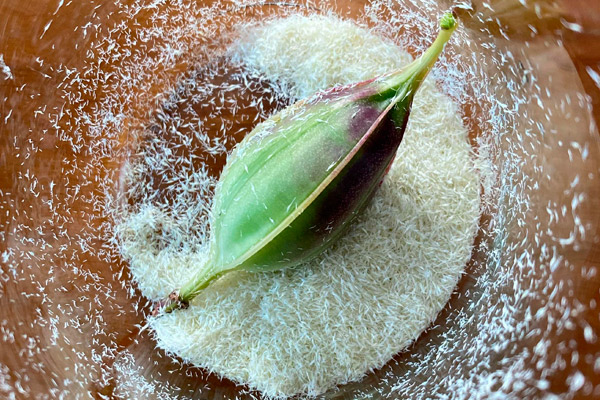
Orchid seeds are very small, almost like dust. Due to their microscopic size and lack of stored nutrients, growing orchids from seeds requires special conditions. Phalaenopsis orchid seeds, for example, resemble tiny brown granules and can only be seen under a microscope.

How to obtain orchid seeds?
Obtaining orchid seeds is a complex but rewarding process that requires specific conditions and knowledge. There are several ways to acquire orchid seeds. You can purchase them from specialized stores or try to obtain them yourself from blooming plants.
Orchid seeds are extremely tiny and resemble dust. To form seeds, the orchid flower must be pollinated.
Stages of obtaining orchid seeds:
-
Selecting parent plants:
Choose healthy, blooming orchids of the same or different species for cross-pollination. The parent plants should be free from any signs of diseases or pests. -
Pollination:
- Identify the pollinia (pollen sacs) and the stigma on the flower.
- Using a toothpick or brush, gently transfer the pollen from one flower to the stigma of another.
- Be cautious to avoid damaging the flower during the process.
-
Seed pod development:
- After successful pollination, an orchid seed pod will form.
- Maturation lasts from 6 to 12 months, depending on the orchid species.
- The seed pod changes color from green to yellowish or brown as it ripens.
-
Seed collection:
- Cut the mature seed pod before it splits open.
- Open it over a clean surface or paper to collect the tiny dust-like seeds.
- Store the seeds in a dry, airtight container until planting.
What to know about orchid seeds:
- Orchid seeds lack a nutrient layer (endosperm), so in nature, they require a symbiotic relationship with mycorrhizal fungi to germinate.
- At home, seeds are grown in a sterile nutrient medium made of agar-agar or a specialized orchid-growing medium.
- The seed germination process is complex and requires sterile conditions, temperature control, humidity, and lighting.
Alternatives:
If obtaining seeds yourself seems too difficult, consider purchasing them from specialized orchid stores. This simplifies the process by eliminating the need for pollination and seed collection.
How to pollinate an orchid to obtain seeds?
Pollinating orchids is a crucial step for obtaining seeds and growing new plants. The process requires precision and knowledge of the orchid flower’s structure. Below is a step-by-step guide to successful orchid pollination at home.
1. Preparation for pollination:
- Select a healthy plant: Ensure the orchid is fully healthy, with strong leaves and flower spikes.
- Choose the right time: Pollination should be done when the flower is fully open, typically 3–5 days after the bud blooms.
2. Study the flower structure:
- Column: The central part of the flower containing reproductive organs.
- Lip: A specialized petal that serves as a landing platform for pollinators.
- Pollinia: Pollen sacs located at the top of the column.
- Stigma: A sticky surface beneath the pollinia where pollen must be placed.
3. Tools needed:
- Toothpick or tweezers: Ideal for handling the pollen.
- Sterile gloves: Prevent contamination of the flower.
4. Pollination process:
-
Remove the pollinia:
- Carefully lift the pollinia cover using a toothpick or tweezers.
- Gently extract the pollinia, which look like tiny yellow balls.
-
Transfer the pollen:
- Carefully place the pollinia onto the sticky stigma of another flower (or the same flower, if self-pollinating).
- Ensure the pollen sticks securely to the stigma.
5. Post-pollination care:
- The flower will begin to wilt after a few days, indicating successful pollination.
- Do not remove the flower spike, as a seed pod will begin forming at the flower’s base.
6. Seed maturation:
- Seed pod maturation takes 6 to 12 months, depending on the orchid species.
- The pod grows larger, becomes thicker, and changes color to yellow or brown as it ripens.
7. Seed collection:
- Once fully mature, the seed pod will split open, releasing microscopic seeds.
- To germinate the seeds, sterile conditions and a nutrient-rich agar medium are essential, as orchid seeds lack stored nutrients.
Tips for successful pollination:
- Perform pollination in the morning when humidity is lower, and the flowers are fully open.
- To create hybrids, use pollen from different orchid species.
- Be patient: seed maturation is a long process, and growing new plants may take several years.
Preparation for sowing orchid seeds
Planting orchid seeds requires creating specific conditions, as orchid seeds naturally germinate only in symbiosis with mycorrhizal fungi, which supply essential nutrients. In home environments, this function is replaced by a nutrient medium designed for orchid seeds.
How to prepare a nutrient medium for orchid seeds?
The nutrient medium for orchid seeds is a gel-like mixture containing essential nutrients for seed germination. Key components include:
- Agar-agar: A gelling agent that provides a moist environment for the seeds.
- Sugar: An energy source for the seeds.
- Mineral salts and vitamins: Necessary for growth and development.
The prepared medium must be sterilized to prevent seed contamination by mold or bacteria.
How to sow orchid seeds?
Seed sowing requires sterile conditions, as even minor contamination can destroy delicate seedlings. The process typically involves:
- Seed sterilization: Soak the seeds in a weak hydrogen peroxide solution for 10–15 minutes to eliminate pathogens.
- Sowing in the nutrient medium: After sterilization, carefully transfer the seeds into flasks or containers filled with the nutrient medium. Use sterile tools to avoid contamination.
- Container sealing: Seal the containers tightly and place them in a warm, bright location, away from direct sunlight.
Caring for orchid seedlings
Caring for orchid seedlings requires attention to several key factors, including transplanting, lighting, temperature, humidity, and watering. These aspects ensure the healthy development of young plants.
Transplanting from a sterile environment is done once the seedlings reach a suitable size. Prepare sterile tools, a disinfectant solution, and an appropriate substrate consisting of fine bark, perlite, and sphagnum moss. Carefully remove the seedlings from the agar medium container, rinse their roots under warm water, and plant them in small pots with good drainage.
Lighting should be bright but diffused. Seedlings need 12–14 hours of light daily, so using grow lights is recommended. Avoid direct sunlight to prevent leaf burns.
The indoor temperature should remain stable. The optimal daytime temperature for orchids is between +22 to +28°C, and nighttime should be around +18 to +20°C. Sudden temperature changes may slow growth or cause diseases.
Humidity plays a crucial role. Seedlings thrive in humidity levels of 70–85%. Use humidifiers, trays with wet clay pebbles, or mist the plants regularly with soft water to maintain appropriate humidity.
Watering should be regular but moderate. Water young orchids when the substrate is slightly dry. Avoid overwatering, which may cause root rot. Immersion watering is the best method to ensure even moisture distribution in the substrate.
Fertilization is needed only after the seedlings are rooted. Use diluted water-soluble fertilizers with low nitrogen content every 2–3 weeks.
Proper orchid seedling care requires attention and consistency, but following these guidelines will help your young plants grow strong and healthy, rewarding you with abundant blooms in the future.
Transplanting orchid seedlings
Transplanting orchid seedlings is a critical stage in their development, requiring precision and adherence to specific conditions. This process is performed when the plants reach a size of about 3–5 cm, with several well-developed leaves and at least one or two roots measuring 1–2 cm.
Preparation for transplanting:
Before starting, prepare the necessary materials: sterile scissors, tweezers, a disinfectant solution (such as a weak potassium permanganate solution), transparent pots with drainage holes, and a suitable substrate. The substrate for orchid seedlings should consist of fine pine bark, perlite, vermiculite, and sphagnum moss. Place a drainage layer of clay pebbles at the bottom of the pots.
Transplanting Process:
- Carefully remove the seedlings from the sterile environment or previous container, taking care not to damage the roots.
- Rinse the roots under warm running water to remove any remaining agar or old substrate.
- Let the roots dry slightly on a paper towel.
- Fill the pot with substrate up to one-third of its height.
- Place the seedling in the center, spreading out the roots gently. Add substrate around the roots, pressing lightly with fingers or tweezers.
- Keep the growing point above the substrate's surface.
After Transplanting:
Do not water the seedlings for 2–3 days after transplanting to allow the roots to heal and avoid rot. Place the plants in a warm location with diffused light and high humidity (70–85%). Start gentle watering using the immersion method after a few days, ensuring excess water drains from the pot completely.
Post-Transplant Care:
To ensure successful rooting:
- Maintain daytime temperatures between +22 to +28°C and nighttime temperatures around +18 to +20°C.
- Provide 12–14 hours of bright but indirect light.
- Water moderately, avoiding waterlogging.
- Fertilize with a weak NPK 10:20:20 solution 2–3 weeks after transplanting.
Proper transplanting and care will ensure healthy growth of orchid seedlings, promoting their further development and flowering.
Challenges in growing orchids from seeds
Growing orchids from seeds at home is a process that requires patience and attention.
The main difficulties stem from the unique characteristics of orchid seeds, which differ significantly from other plant seeds.
-
Tiny Seed Size:
- Orchid seeds are extremely small and resemble dust, making collection, storage, and sowing challenging.
- Each seed lacks an endosperm—a nutrient reserve—making it entirely dependent on external conditions for germination.
-
Specific Germination Requirements:
- For successful germination, seeds need a symbiotic relationship with mycorrhizal fungi, which supply essential nutrients. These fungi naturally occur in tree roots.
- At home, this process is replaced by specialized nutrient media based on agar, requiring sterile conditions.
-
Need for Sterile Conditions:
- Sowing orchid seeds is conducted under laboratory-like conditions using sterile boxes or autoclaves to prevent fungal and bacterial contamination.
- Even the slightest breach of sterility can lead to the loss of the entire seed batch.
-
Long Development Process:
- Germination takes several months to several years. During this time, seedlings require constant care, with proper temperature, humidity, and lighting.
- Transplanting young plants from flasks to the substrate is another complex stage involving a high risk of damaging fragile sprouts.
-
Special Equipment:
- Growing orchids from seeds requires special lighting lamps, thermostats, sterile boxes, and culture media, making the process costly and labor-intensive.
-
Low Survival Rate:
- Even under ideal conditions, the survival rate of young plants remains low due to the natural biology of orchids.
- Only the strongest specimens that can adapt to their environment survive.
-
Demanding Post-Germination Care:
- Transplanted plants require meticulous care, including proper watering, fertilization, and pest protection.
- Any deviation from recommended conditions can slow growth or cause the young plants to die.
Conclusion:
Growing orchids from seeds is a challenging but incredibly rewarding process, allowing you to witness every stage of plant development—from a tiny seed to a beautiful flowering specimen. Despite the challenges, it is possible to grow orchids from seeds at home if you provide the right conditions and carefully monitor each step. This endeavor requires time, patience, and knowledge, but the result is well worth the effort.
If you decide to buy orchid seeds and try this fascinating process, prepare yourself for an exciting journey into the world of orchids, full of discoveries and new knowledge.
